Adding vector textures to your patterns is so simple in Illustrator and is just a matter of layering. If you know how to create a repeat pattern this tutorial is going to be easy, however, if you don’t know how to create repeat patterns, I suggest you watch this tutorial on creating repeats here before you continue. For this tutorial you will need to get your hands on some vector textures. The vector textures I will be using are from Creative Market. It comes in a pack of 20 and is $4 for a standard license, however, if you don’t want to buy vector textures you can search in google for free vector textures and there are a ton of options for you to choose from. Once you have chosen the vector texture you want to use, you are ready to get started.
Step 1:
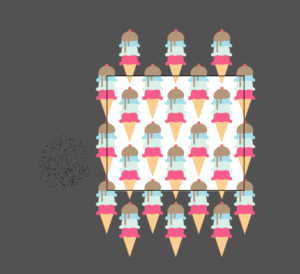
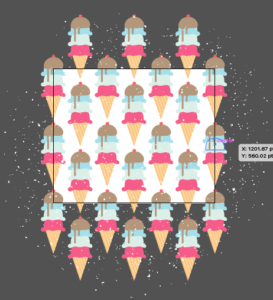
Bring your pattern and the vector texture you want to use into the same file.
Step 2:
You then need to deside what color you want your texture to be. I want my texture to only be visible on the ice cream scoops so I am going to make my texture the same color as the background (i.e. white).
Step 3:
Increase your texture to fit over the entire artboard by selecting the texture and dragging its corners outwards while holding down shift to retain its shape. If you don’t hold down shift during this stage you will distort the texture so it is important that you hold down shift.
Step 4:
Lock your pattern by selecting the whole pattern and pressing control-2. Make sure when you do this step you do not select the texture because you will need to manipulate the texture.
Select your texture and ungroup it (control-G).
Step 5:
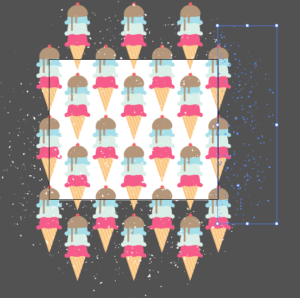
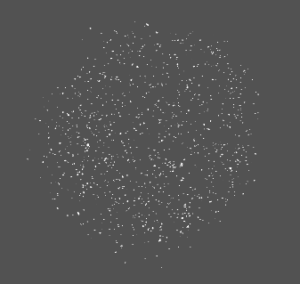
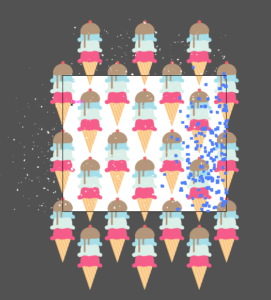
Select every litte texture speck that is on the right side of the artboard and delete it. This includes all of the texture specks that are both on the artboard and outside of the artboard. Anything that is hanging off your artboard, even in the slightest, you need to delete.
Repeat that step by deleting everything that is hanging off the bottom of your artboard. The reason you want to do this is because with repeat patterns the top and bottom edges and the left and right edges need to be the same so the pattern can repeat seemlessly.
Step 6:
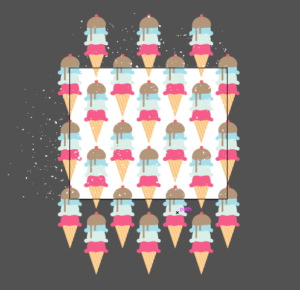
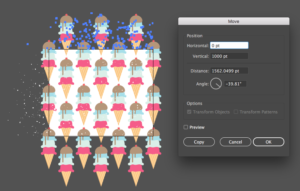
Grab the texture specks to the left of the artboard and move them across your arboard. Many pattern designers work in 1000 by 1000 artboards so typically you would be moving the specks 1000 pts. horizontally, however, my artboard is 1200 x 1000 so I need to move mine 1200 pt.
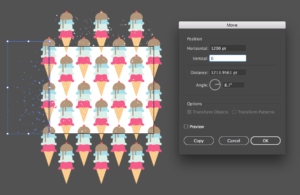
With the left side specks selected, press shit-control-M to open up your move options box. Type the width of your artboard into the horizontal box (i.e. 1200) and 0 in the vertical box and press copy.
You will see when you do this that some of the vector texture specks start to overlap with ones that were already there. If you don’t want this to happen you can delete some of the specks on the left side and try to move your specks again.
Repete the same steps by selecting the specks on the top of the artboard and copying those spects on the bottom side of your artboard. Your horizontal box should read 0 and your vertical box should be the height of your artboard, i.e. 1000 in my case.
Step 7:
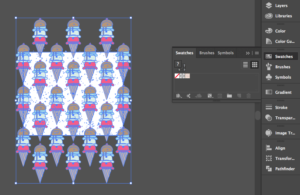
If you followed the directions of the youtube video I provided in the first paragraphy, your pattern should be done. Unlock your pattern (keyboard shortcut: alt-control-2) and with every element of your pattern selected, drag your pattern to your swatches pannel in the right side toolbar.

Then you are done! You now have a pattern that has been improved using vector textures. If you have any questions about this tutorial leave a comment and I will try to answer them. If you do use this tutorial on one of your patterns I would love to see it. You can tag me on instagram @kelciemakespatterns.
If you liked this post, why not share it! It lets me know what posts you like so I can make more posts like this.