Adobe Illustrator 101: How to Make Pattern Brushes to Use in Your Surface Pattern Designs
A good pattern designer or graphic designer will always find ways to streamline their process. You may need to create multiple variations of a project using the same detailing on different elements or you might what to use the same basic detailing over multiple projects so having a way to accomplish symmetry between a collection of patterns/artwork with minimal effort is extremely important. One way I like to achieve this sense of uniformity is through the use of pattern brushes. In this tutorial, I will teach you how to make simple pattern brushes which you can save and use over and over again.
So, let’s get started!
I drew a heart using the pen tool (Keyboard Shortcut: P). If you want to follow along, you can create the heart using the pen tool or draw a heart using the blob brush tool (Keyboard Shortcut: Shift – B).
Take the heart and with the heart selected, hold down alt and shift and drag the heart about half an inch to the right. This should create a duplicate of the original heart and should look like this.

In order to set the boundaries for the pattern brush, you want to create a no-fill no-stroke box beneath the hearts. Even though there are two hearts on your artboard right now you don’t want to capture both hearts within the border box. The second is just for measuring so you can see how big you want the space between your hearts to be.

For the purpose of this tutorial, my border box has a black stroke on it so you can see it. Unlike my box, your box shouldn’t have a stroke color. You can now delete the second heart outside of the box because you don’t need it. Select the heart and the border box and open your brushes panel in your right side toolbar.
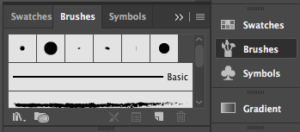
At the very top of the brushes panel, there are 4 horizontal lines that look something like this:

This is your brushes menu and will have everything you need to create, edit and save brushes. To create a new brush, make sure the heart and box are selected and click on your brushes menu (i.e. the 4 horizontal lines).

This will open a drop-down menu which you can then go ahead and click “new brush” at the top of the menu.
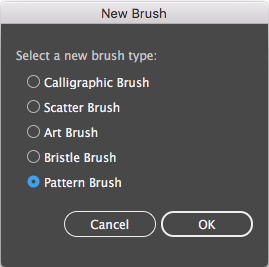
A popup will appear with options on what kind of brushes you can make. Select the pattern brush option and click ok.
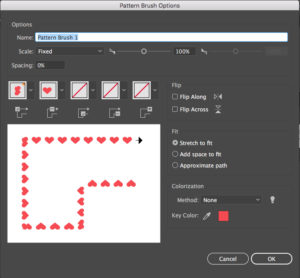
A pattern brush options popup should appear with a bunch of options on how you can manipulate your pattern brush, however, you only need to do two things. First, name your pattern brush something easy to remember like “hearts” so you can find it later. Second, you want to remove the heart pattern that is acting as the pattern brushes corner, i.e. the first box. As you can see in the picture, this heart pattern is creating a corner that is a bit wonky. This is typical of most pattern brushes you try to create so to avoid this issue, there are 5 boxes in a row and you need to click on the first one.
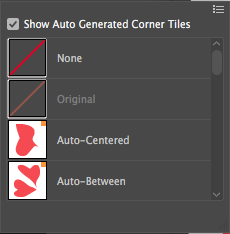
You will then see another drop-down menu with a few options on what you can do with the corners. Scroll all the way to the top of the drop-down menu, click none, and press ok to finish your pattern brush. Using the paintbrush tool you can now draw with your new pattern brush.
So what can you use a pattern brush for?

A while back you might remember I made this pattern featuring taxi’s. That checkered detailing on the taxi was created using a pattern brush that I had on hand.

I also created this American flag using a simple star pattern brush that I created from one of the shapes that Illustrator already gives you.
The possibilities with a pattern brush are endless. Leave a comment down below explaining how you like to use pattern brushes.
PS: If you are going to use a pattern brush in a pattern, you need to go to object and expand the pattern you created with your pattern brush. Illustrator won’t allow you to create swatches of things with pattern brushes in them so when you expand the brush you can then drag it into the swatches panel.
If you liked this post, why not share it! It lets me know what posts you like so I can make more posts like this.

Floatinggold
Such a great step-by-step tutorial!
Kelcie Makes Patterns
Thank You!