
 For this week’s blog post I wanted to teach you how to actually make something, in this case, a coffee cup. This tutorial requires some knowledge of basic Adobe Illustrator functions, however, I have provided links to relevant articles that explain certain Illustrator tools in depth so you might be able to get by if you are a true beginner to Illustrator.
Let’s get started!
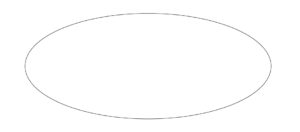
1. Draw an Oval Using the Ellipse Tool
The first step in making a coffee cup is drawing the outline of the cup. You can then go in and fill it with color but for now, everything you draw should have a black stroke and no fill. Start out by drawing an oval with the ellipse tool.
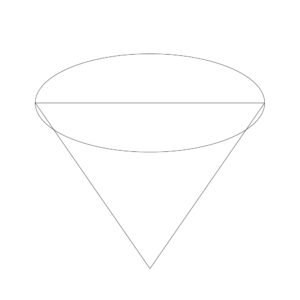
2. Draw a Triangle Halfway Down the Oval Using the Side Anchors as Guides
Each shape made with the ellipse tool starts out with 4 anchors: one on each side of the circle and one on the top and bottom of the circle.
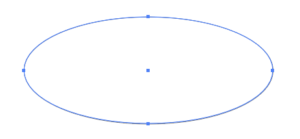
With the oval, we just drew we are going to focus on the two side anchors.

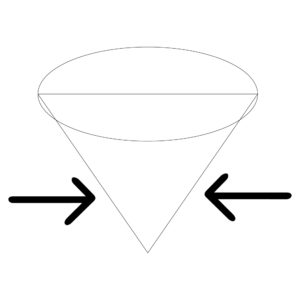
Use the pen tool to draw a triangle from the two anchors downward. The point of the triangle should be pointing down. Make sure smart guides is turned on so you can center the point in the middle of the circle. You can turn smart guides on by going to view and clicking on smart guides. With smart guides turned on, when your pen tool lines up with the center of the circle a pink line will appear. Your end result should look like this:
3. Round the Bottom Edges of the Triangle
Holding down alt while pulling out lines with the pen tool will cause the lines to curve.
Take the bottom two lines of the triangle and one at a time, pull them out. In order for this to work, the pen tool has to be selected and you have to hold down alt.
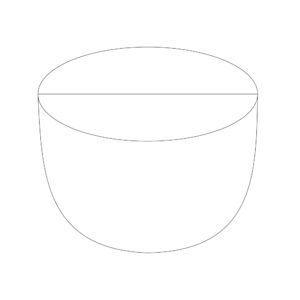
Rearrange the cup by moving the oval so it is on top of the cup base. You can do this by right clicking on the oval, scrolling down to arrange, and clicking on bring to front.
4. Create the Inside of the Cup
Select the top oval and copy it (Ctrl-C). Paste (Ctrl-F) the new oval exactly on top of the original circle. Grab the top oval and drag the circle in about a half centimeter on all sides.
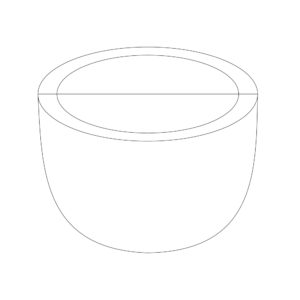
To keep the integrity of the oval, while decreasing the size of the circle hold down alt and shift. Alt allows you to decrease the oval from the middle of the oval rather than one of the sides and shift will lock the shape of the oval so when you are decreasing it the proportions of the original oval stay the same.
Select the inward oval and while holding alt to duplicate the circle drag it down about a half centimeter.
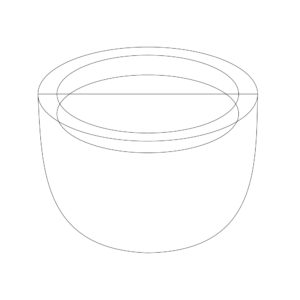
Select the two inside ovals and go over to your pathfinder panel and press divide.
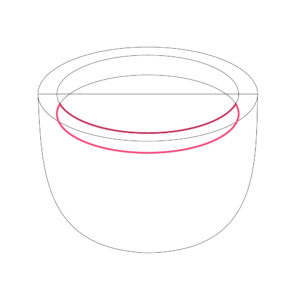
You no longer need the section shown in red so delete it.
5. Fill in Your Cup with Colors
At this point, you can start filling in your cup with color to get a feel of what it is going to look like. 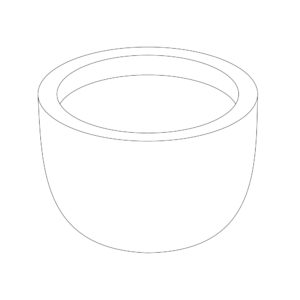
To start I filled all the elements in my cup with white so you can see what the cup should look like with all of the unnecessary lines removed.
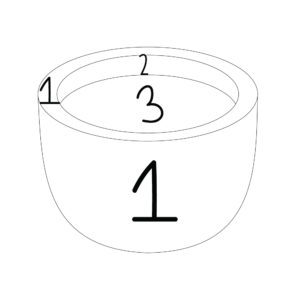
I have created this sort of paint by numbers graphic to make it easy for you to distinguish which colors need to be the same. To use the same colors that I used, follow this guide:
1: #ffffff
2: #f2f2f2
3: #895724
For the second color denoted by the #2, you should pick a color that is slightly darker than #1. After you have picked all of your colors, remove all of the black strokes. Depending on the color of your cup you might also want to create a colorful background. My artboard is the same color as the cup so I used the rectangle tool to create a square the size of my artboard (1000 by 1000) and sent the square to the back of my drawing.

6. Draw the Coffee Cups’ Handle
To create the handle we are going to use the blob brush tool. When using the blob brush tool, if the color of the brush is the exact same color as any of the elements in your cup it will unite with that color and create one large shape. If you want the handle to be a different color from the base of your cup, you don’t want your handle to unite with your cup so to start out, pick a color that is different from all of the other colors in your cup.

Change the color of the handle to your desired color and send the handle behind the cup. Don’t send the handle all of the way to the back because then the handle will go behind the background color.

7. Add Some Shading
Use the pen tool to draw a curved line in the brown coffee. Pay attention where you want the light source to come from. I wanted the light source to come from the top right corner so my shading needed to reflect that. Your cup should look like this:

Select the black line you just drew and the brown coffee. In the pathfinder panel apply the divide tool. This separates the coffee into 2 sections. Ungroup the sections (shift-ctrl-G) and change the color of the smaller section to a darker shade of brown.

The brown I used was #68411a.
To add shading from the cup, draw a shape around the handle of the cup so that the corners are touching the top and bottom of the cup like so:
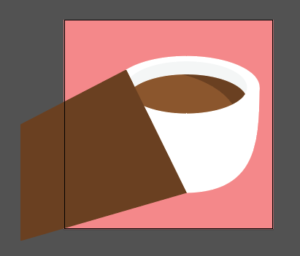
To make things easier, make sure the shape goes over the edge of the artboard. You can then divide the new shape and the background color using the pathfinder panel so the shape lines up perfectly with the background square. Once you do this, you cannot adjust the shape of the shadow so don’t divide the objects until you have everything just the way you like it. Move the shadow and the background color behind the coffee mug.
The shadow should be slightly darker than the background color. Since my background color is #ef8989 I need something slightly darker than that so I chose #e07c7c for the shadows’ color.

That’s it! You now have a nice coffee cup you can use on your website, product, etc.
If you have any questions about this tutorial I will be happy to answer them in the comments.
If you liked this post, why not share it! It lets me know what posts you like so I can make more posts like this.
SaveSave

Moti
Simple yet beautifully explained. Can you please explain how to divide a circle into 108 parts?
Kelcie Makes Patterns
How do you want to divide the circle? Do you want to divide it into wedges like a pie chart? Also, please send me an email at kelciemakespatterns@gmail.com. I was starting to type out the explanation in the comments, however, it would be a lot easier for you to understand with pictures.
Kelcie Makes Patterns
I decided that your question would make a good blog post for today so I explained how to do it in detail. If you are still interested in knowing how to divide a circle into 108 parts you can read the post here: https://kelciemakespatterns.com/divide-circle-equal-parts-adobe-illustrator/
Catharina
I might be an idiot, and you may have responded to this question earlier, but the line across the top of the cup? How does one remove that from the illustration?
Kelcie Makes Patterns
I can see how that might be confusing. So in step 3, I mentioned about rearranging the top of the cup (the oval) so it was on top of the base of the cup. You can do this by selecting the oval, right-clicking the oval, scrolling down to arrange, and clicking on bring to front. If you did that correctly, then in step 5 it says to fill in your cup with color. Since you previously arranged your oval to be in front when you fill the oval in, it will hide the line on the cup. I think the thing that is confusing you is that in one picture it had the line and in the next picture, the line was gone, but that is because I filled the cup in with white so it would be easy for the reader to see what the cup would look like at that stage. I hope this makes sense, but if you still are confused about what to do, I can try to send you a video in the next few days to show you what I mean.
Lamar Dunkin
Eventually you will color over it, If it still appears on the cup simply move the bottom portion of the cup backwards behind the brown coffee and the mug 🙂
Sasha
I like the simplicity of your article. You are providing create a vector cup in Illustrator in a very simple way. Often people experiment with filters in photoshop and other image editing tools but creating vectors is always something which is appreciated by graphic design artists. Totally loved it. Add a bit of smoke and it will look more awesome.
Kelcie Makes Patterns
Thank You. The smoke is a great suggestion.
Keith
Ah – never mind that last question – I figured it out.
Kelcie Makes Patterns
Glad you figured it out. Let me know if you have any more questions.
Charlotte Gingell
Great tutorial, thank you. Just wondering how to add the smoke? Complete newbie here lol xx
Kelcie Makes Patterns
Hey Charlotte, I believe I used the pen tool to draw the smoke. If you press P on your keyboard you can select the pen tool. I would suggest if you are not familiar with the pen tool to find a tutorial on YouTube for it (there are many). The pen tool takes a while to get used to, but when you master the pen tool, it is worth it. Let me know if you have any more questions and I will be happy to answer them.
Katy
I dont get how to divide and remove the other half of the circle
Kelcie Makes Patterns
Hey Katie, to divid the other half of the circle you have to select the two circles, go over to the pathfinder panel, and press divide. The pathfinder panel can be found by going to window tab at the very top of your screen in the top toolbar. If you hover over the little icons in the pathfinder panel it will reveal the names of the tools and the divid tool should be the first icon in the second row. I am unable to post pictures in the comments so if you still need help, send me an email at kelciemakespatterns@gmail.com and I can send you pictures to guide you to where to go.