A few weeks ago you might remember I taught you how to add texture to your patterns. This is a continuation of that tutorial except you are going to learn how to make your own textures. After reading this tutorial, if you want to learn how to apply the texture you made to your patterns you can read that first post here.
Let’s get started.
Step 1:
The first thing you should do is figure out which medium you want to work with. You want something with texture so a marker that is losing it’s ink or a book with a woven texture would be perfect for this. There are a lot of things you can use at this stage, but if you are using something like paint you have to make sure there is some white in it. Putting a little bit of paint on the paintbrush and working all of the paint out of the brush is a great way to make textured brush strokes, but when you just make a square that is completely black the texture wont show up well.
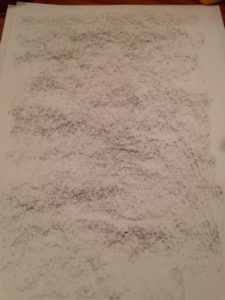
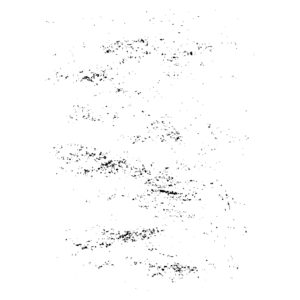
If you want to follow along with this tutorial, the texture I am using is the product of a crayon turned on it’s side. I recommend using a black crayon since it creates a more clear distinction between the black and white, but if you don’t have something black to create your texture that is still ok.
Step 2:
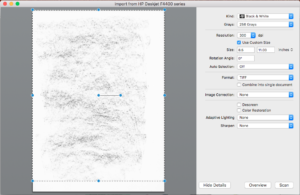
Scan your texture into your computer. Before you scan your texture there are a couple of details that should be changed in your scanning settings. Make sure you are scanning in black and white and change the dpi to 300. If your texture doesn’t take up the full page you might want to also crop your image so it is only scanning in the texture. Once you are finished scanning your texture, save it to the desktop.
Step 3:

Drag your texture from your desktop into Adobe Illustrator. Right away I notice that there is a line at the bottom of my texture that I do not want. We will clean that up later.
Step 4:
Select your texture and in your right side toolbar, go to image trace. If you cannot see image trace in your toolbar you can find it by going to window and scrolling down to image trace.
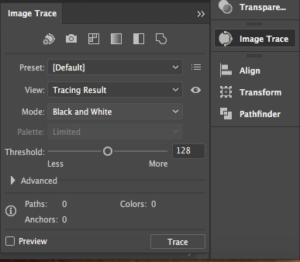
Change the mode to black and white and press trace.
Step 5:

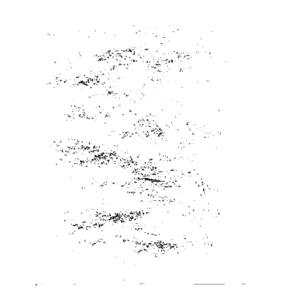
As you can see with the above picture, when I traced my texture it got rid of a lot of the detail. We can fix that by increasing the threshold in your image trace panel.

The threshold started at 128 which was too little so I increased it to 192.
The threshold number is just a preference. If you want your texture to be more compacted increase the threshold even more and if you want a less busy texture, you can decrease the threshold.
You can also mess with paths, corners, and noise in your advanced settings and see how that affects the look of your tutorial, but for the purpose of this tutorial, changing the threshold is enough.
Step 6:
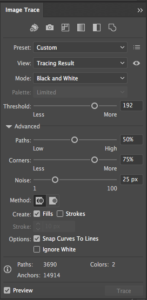
Open up the advanced settings in your image trace panel and make sure ignore white is selected. This will get rid of the background color.
Step 7:
With your texture selected, go to object in the top toolbar and press expand.
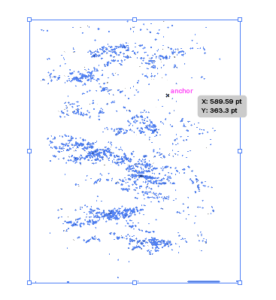
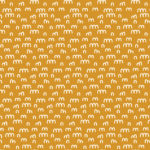
You now have a texture that is almost ready to be applied to your pattern.
Step 8:
The last thing you need to do is clean up your texture. At the very bottom of my texture there is a line that I want to get rid of so I will probably delete the whole bottom row. In order to do this, you want to use the direct selection tool, select all of the paths you want to delete, and press delete.
Your texture is done! You can use this texture to apply to your patterns, layer on top of your handlettering, add depth to your digital artwork, etc. Again, if you want to learn how to apply your texture to a pattern click here. If you have any questions about this tutorial, leave a comment down below and I will try to answer it.
If you liked this post, why not share it! It lets me know what posts you like so I can make more posts like this.
Mike
Nice, clear explanation – pics could be a bit bigger – can’t try it ‘coz I don’t use Illustrator – I use Affinity Designer
Kelcie Makes Patterns
Thanks for the feedback. I can definitely see the pictures being too small. Some of the pictures I took by screen capturing certain parts of the screen so I am always worried about the pictures being too blurry but I will have to do that.
Mike
It’s a problem but most image programs will resize pics OK – I tried with one of your images and made it 25% bigger in Windows Paint and it looked OK – not as clear but readable. I tried with the program I use – Faststone Image Viewer (it’s free) and got a much better result that looks perfect but bigger if that is any help
Kelcie Makes Patterns
That is a lot of help. Thank you for the suggestion. I am going to try it.