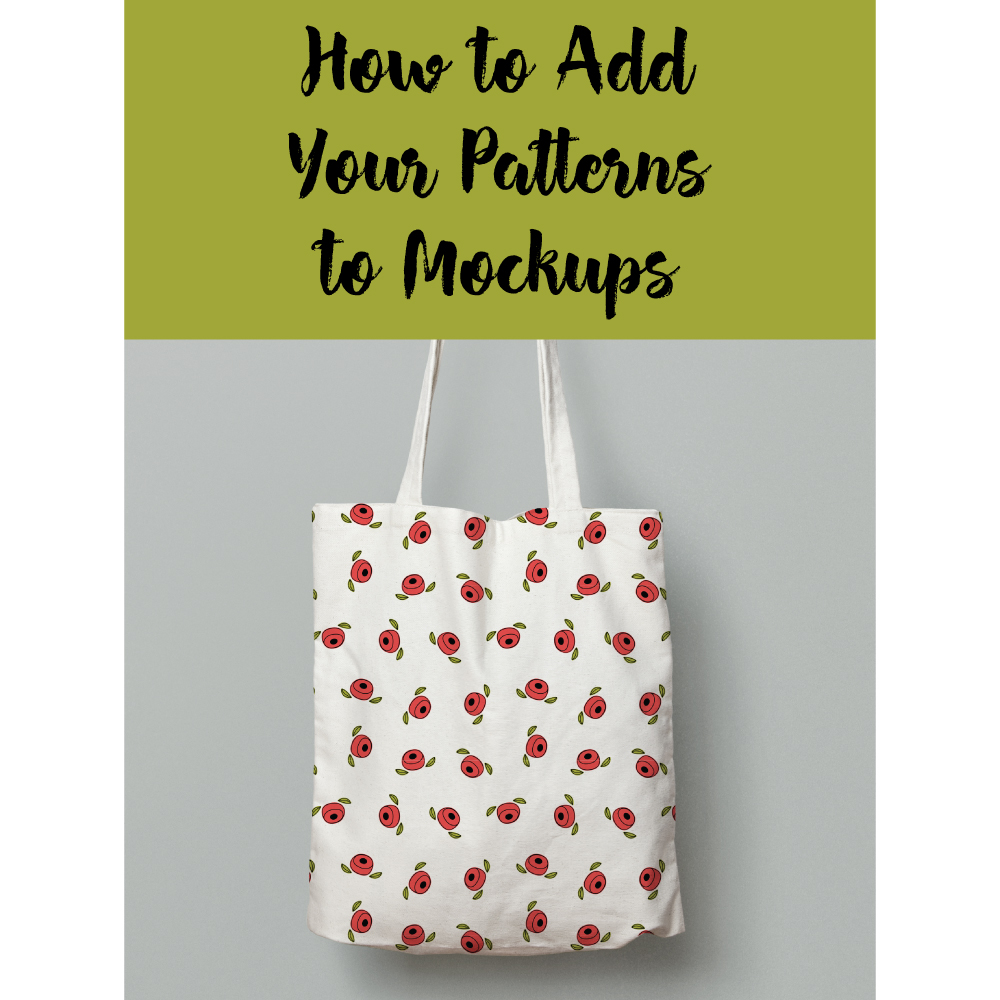
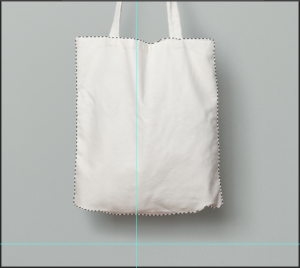
I wrote a post a few weeks ago about my top 5 favorite free mockups and I wanted to follow that up with a post about how to apply your patterns to one of the free mockups: a tote bag. I picked the tote bag because the other 4 mockups are rather self-explanatory as they tell you exactly where you need to place your pattern, but the tote bag requires a little bit of experience with Adobe Photoshop. If you want to follow along using one of my free patterns, you can find it here.
Let’s get started.
Step 1:

Draw out your pattern in Adobe Illustrator with the rectangle tool (M) and copy it (Control-C).
Step 2:
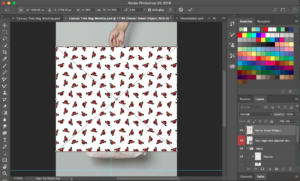
Paste (Control-P) your pattern on top of the tote bag mockup in Photoshop. When you paste your pattern in Photoshop, make sure you are importing it as a smart object.

Increase the size of your pattern to at least cover the size of your tote bag. You can increase it more if you what your pattern to be bigger, but never decrease it smaller than the base of your tote bag. Once you have finished adjusting your pattern, double-click it to place the pattern.
Step 3:
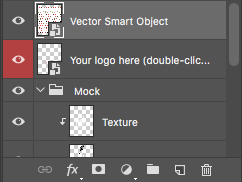
Go over to the layers panel on the right side of your toolbar and hide the layer with your pattern in it. To do that click on the eye icon next to the layer (vector smart object) that has your pattern on it.
Step 4:
Next, you need to select your magnetic lasso tool. Usually, your magnetic lasso tool can be found by clicking and holding down on your lasso tool in your left-side toolbar to unveil the magnetic lasso tool. For some reason, my magnetic lasso tool is trying to hide from me so if you cannot find your magnetic lasso tool in its right place, hold down on the ellipsis looking icon at the very bottom of your left-side toolbar. Your magnetic lasso tool should be in there. Use the magnetic lasso tool to trace around the outline of the base of your tote bag making sure not to include the straps. This tool isn’t perfect so if you mess up when outlining your tote bag, you can delete it and start over.
Step 5:
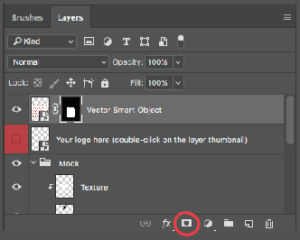
Unhide your pattern and click on the clipping mask icon at the very bottom of your layers panel. Your pattern should now look like this:
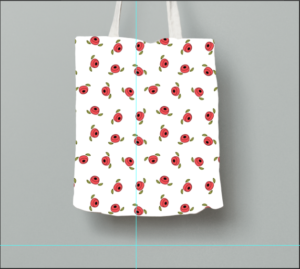
As you can tell by the picture, this is not how you want your pattern to look so to make your tote bag look more natural, we need to change the blending mode.
Step 6:
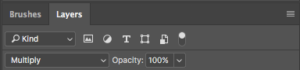
Change the blending mode from normal to multiply and you are done.
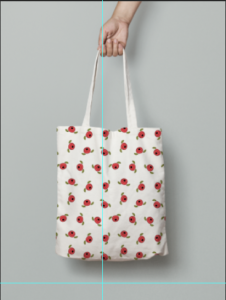
If you take a picture that you want to add your pattern to, you can use this technique to do so, however, make sure that the object you are trying to place your pattern on is white. Otherwise, your pattern will take on the color of the object behind it. You might want to use this tote bag pattern again with another pattern so in that case, you don’t have to retrace the tote bag. Just follow steps 1 and 2 to add your pattern into Photoshop and drag the layers mask thumbnail to your new pattern. The layers mask thumbnail is the black and white almost square looking shape next to the original pattern in your layers panel and looks like this:
![]()
After you have dragged the layers mask thumbnail to your new pattern you can delete the layer that holds your old pattern. You then need to again change the blending mode to multiply.
I hope you found this tutorial helpful.
If you liked this post, why not share it! It lets me know what posts you like so I can make more posts like this.