When you have a blog or website it is often helpful to have basic images where you can throw on some text and make a graphic for your blog post. This way when you are running low on time you can create a good looking graphic for your post which you can then quickly taylor it to your post with text. This tape design is really easy to make and is a perfect design for any blog post graphic. It also can be used to create a calendar graphic, as the background for notebook pages, and for a simple shop banner.
Let’s get started!
We are going to be working with a 1000 pt by 1000 pt artboard.
Step 1:
The first thing you want to do is select the rectangle tool (M) and click anywhere on your work area in Adobe Illustrator.
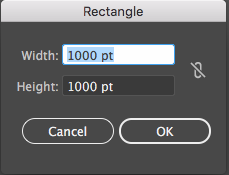
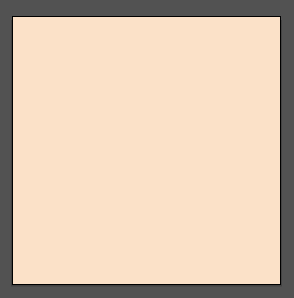
This should open up a rectangle tool options box. Add 1000 pt in the width box and 1000 pt in the height box and press ok. Drag your box to your artboard making sure it fits perfectly on the artboard. This box will act as your background color so change that color to anything you want. The only stipulation is your background color should not be the same color as your paper color. I want my background to be a cream color so in my left side toolbar I am going to click on my fill box which looks like this:

I am then going to pick a cream color to apply to my background. The color I chose is #F8E0C5 and looks like this:
Step 2:
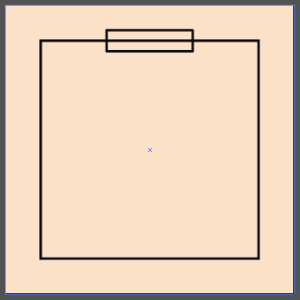
Use your rectangle tool to draw a box for your paper and a thin rectangular box for your tape. Instead of clicking on your workspace to create a specific sized box, you can click and drag out your two boxes to any size you want. You could also rotate your paper a little so it is not as straight, but for now, we will work with a straight box.

Color in your paper and tape using the fill box pictured in step 1.
Step 3:

The next thing you want to do is draw a small triangle. You can do this using your pen tool (P). Rotate that triangle so the top point of the triangle is pointing to the right and line it up with the top left corner of your tape like in the picture above.
Duplicate that triangle down the side of the tape until you reach the bottom of the tape.

Its ok if the triangles run longer than your tape. To fix that select all of your triangles using the selection tool (V) and use the bounding box to make your triangles fit inside the tape.

Do the same thing with the other side of the tape making sure that the points of the triangles are facing the opposite direction.
Step 4:

Select the tape and the triangles and grab the shape builder tool (shift M) in your left side toolbar. Hold down alt and click on the triangles to delete them. This creates a zig zap edge that mimics that of tape that was ripped from a tape dispenser.
Step 5:
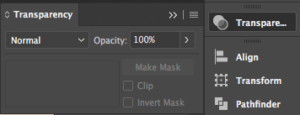
Select the tape and head over to your transparency panel in your right side toolbar. Click on the box that says normal to reveal transparency options.
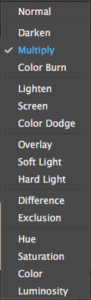
Select multiply to give your tape a slight translucent tape-like feel.
Step 6:
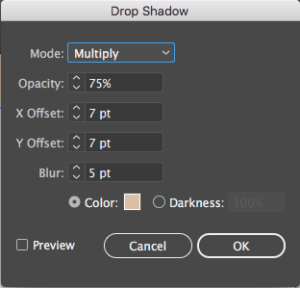
Your last step is to select the paper and click on effect in your top toolbar. Scroll down to stylize and click on drop shadow. Keep all of the default settings the same except for the color. The color should be a darker shade of the background so in my case a darker cream. Press ok and you are done!

If you want to add more details to this design you could also add patterns like stripes and arrows to the tape to give the tape a washi tape feel. The only thing to remember when you are using the multiply transparency is if you choose a white the multiply transparency will make it look like there is nothing there. Choosing a black color also produces zero to no effect so stay away from those two colors.
I hope you found this tutorial helpful. Leave a comment down below if you have any questions I can clarify for you.
If you liked this post, why not share it! It lets me know what posts you like so I can make more posts like this.