How to Use the Blend Tool with Odd Shapes (Adobe Illustrator)

The blend tool is a great way to add simple shading to your designs without the hassle of messing with the gradient tool. It’s not so great, however, when you need to create shading on unique shapes.
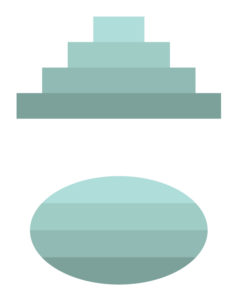
For example, say you have the two shapes above and you want to create a blue linear gradient using the blend tool.

The first shape when blended with the blend tool, loses its original shape.

When the second shape is blended, you can see the edges are not blending properly. So how do we fix this? It is actually quite simple if you know how to create clipping masks so here is a quick and easy way of how you can use the blend tool on unique shapes.
Let’s Get Started!
Step one:

Draw the shape you want to be blended with the pen tool (P), pencil tool (N), or any of the shape tools and copy it (Control-C)
Step 2:
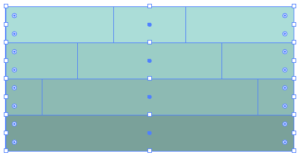
Add colors to your shape from light to dark making sure that all of the colored boxes are stretched to line up with the longest part of your shape. You can create the boxes to add color with the rectangle tool (M).
Step 3:
Select all four boxes and go to object, blend, and blend options.

Make sure spacing in the blend options box is set to smooth color and press ok. Go to object, blend, and make to activate the blend tool.

Step 4:

In step one I asked you to copy your original shape. If you did that correctly you should be able to paste the original shape on top of your gradient blend (Control-F). If that didn’t work you can still select your original shape which should be under your gradient blend and copy (Control-C) and paste (Control-P) it.
Step 5:
Now that your original shape has been copied on top of your gradient blend, select all (Control-A) and create a clipping mask (Control-7).

That’s it. This was something I struggled with when I started learning Adobe Illustrator so hopefully, you guys found this tutorial useful.
I just wanted to end this post by explaining why you may use the blend tool over the gradient tool. If you needed to create a standard gradient that was either linear or radial you can get by with the gradient tool, but if you need to create a gradient that mimics the curves of a specific unique shape, the blend tool can help you with that. For instance, if you wanted to create waves in your gradient like this:
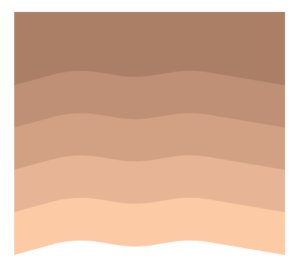
it might be easier to draw the gradient out first and then blend it. If you are not confident in picking colors that would make a good gradient, especially if you need to blend two different colors, I wrote a post a while back about using the blend tool to get lighter and darker variations of a color that you can find here. Instead of using black and white like in the tutorial you can pick two end colors and blend them using the blend tool.
If you liked this post, why not share it! It lets me know what posts you like so I can make more posts like this.