
Adobe Illustrator 101: Creating Faux Hand-Drawn Strokes in Adobe Illustrator
Longtime readers might know that I love to do tutorials on how to add small hand-drawn elements to your designs. This tutorial is something simple you can do to add those hand-drawn elements to your designs and is the perfect tutorial for beginners. Essentially you are going to be creating outlines for your design with the pencil tool, so this easy tutorial won’t take long, but will add a lot of cool details to your design.
Let’s get started!
Step 1:
Draw your picture using the pencil tool (N). I suggest you use the pencil tool and not the pen tool because the pen tool creates more exact lines and you want your lines to feel loose and slightly all over the place to create that hand-drawn feel.

Before you begin drawing your object, make sure your fill color in your left side toolbar is set to none and your stroke is any color. I like to use black for my strokes so I can see them better, but any color will do.
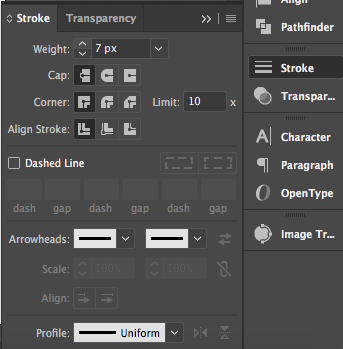
What I also like to do is go to my stroke panel in my right side toolbar and increase the weight of the stroke to something around seven so I can see the stroke better.
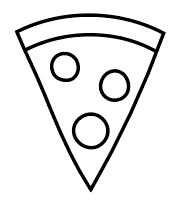
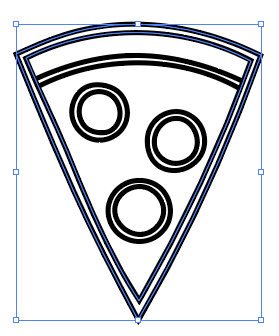
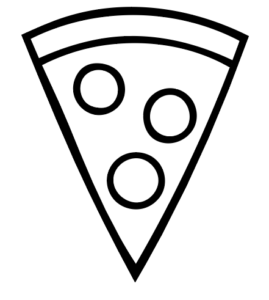
Make sure your pencil tool (N) is selected and draw out your object. You can see with my pizza, the lines are not straight. I could go back in and redraw those lines, but in order to create a more hand-drawn effect, I want to keep those lines. You may also notice that the design is nothing special. I have noticed that with a lot of my designs that if I outlined the design with strokes it often looks like I created some paint by numbers or coloring book drawing so I don’t want to stop here.
Step 2:
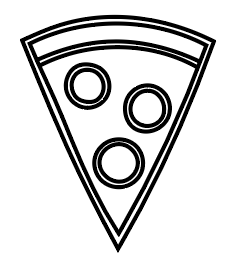
Draw a second stroke around all of the strokes you already drew. Don’t just copy and paste your strokes and make them bigger to achieve this effect. You want to have your strokes be slightly different for a more hand-drawn feel.
Step 3:
Select two strokes of the same shape as in the picture above. Select your shape builder tool (Shift-M). We want to use the shape builder tool to delete the inside of your shapes.
To do that hold down alt with the shape builder tool selected and click on the inside shape to delete it. The grayed out section in the picture above shows what you are actually going to be deleting. You want to complete this step for all of your strokes until you have deleted all of the inside shapes. For example, I want to delete the inside circle of my two pepperoni strokes so I am going to select my two strokes and then my shape builder tool (Shift-M).
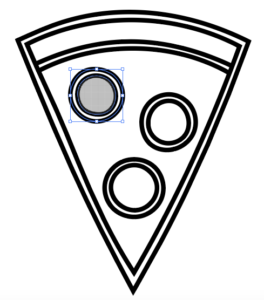
I am then going to hover over the inside circle shape I want to delete like in the picture above. Hold down alt and click on the shape to delete it and you should be left with only the ring around the pepperoni. Complete this for the rest of your strokes.
Step 4:
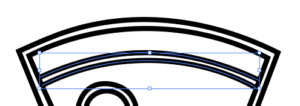
Some strokes, like the line detailing between the pizza crust and the actual pizza, don’t have a shape that needs deleting. Instead, take your pen tool (P) and connect the two lines at both ends.
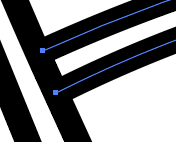
Each stroke has an anchor point on their ends as shown in the picture above to connect these strokes with the pen tool click on one anchor point and then click on the other anchor point to join your strokes. Do the same thing with the other side of your stroke.
Step 5:
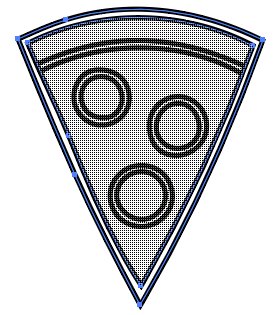
Now that you have prepared all of your strokes and deleted any shapes inside of them, fill in your stroke outlines with a color.

You can do that by double-clicking on your fill box in your left side toolbar. If you look at the picture above you will see two different boxes. One box is a completely filled in square that in the picture above is behind a box that has a square chunk taken out of it. This might be reversed for you. The back square box is what you need to click on to add a fill color. The box that has a square taken out of it is how you change the stroke color. We don’t want a stroke color anymore so we a going to click the right box underneath your fill and stroke box that has a diagonal red line in it. Make sure when you add/remove a fill or stroke color that you have your design selected or it will have no effect on your design. Your design should now look like this:
Step 6:
Select another fill color and color in your design using the blob brush tool (Shift-B). To save time when drawing I want to show you a setting you can use to streamline your design process. If you just use the blob brush tool and nothing else, when you fill in your color with the blob brush tool it will draw your fill shapes on top of your outlines like so:

You would then need to select your fill and move the fill to the back of your design. To eliminate that step, there are 3 settings at the bottom of your left side toolbar that look like this:
![]()
The middle setting is the draw behind tool (Shift-D). Select that setting and then select your blob brush tool (Shift-B). When you draw your fill this will automatically send your fill to the back of your drawing. To use this setting, you have to think about what is going to be on top. In my case, I want the pepperoni to be on top so as I color in my design the pepperoni should be colored in before you color in the pizza base. If I decided to color in the pepperoni last it would have put the pepperoni behind the pizza base which we don’t want.

Once you finish coloring in your design you are done. The end result is very subtle but when you use this technique in a pattern or design it really adds a lot. For example, this is a pattern I created using this technique:

The possibilities with this tutorial are endless. Let me know how you use this tutorial in your designs.
If you liked this post, why not share it! It lets me know what posts you like so I can make more posts like this.