How To Create Hand-Drawn Details For Your Patterns Using Image Trace

I have done a lot of blog posts lately about not needing a design tablet to use Adobe Illustrator and this is no different. It’s one of my favorite topics to discuss because when you start out in Adobe Illustrator and surface pattern design you don’t necessarily have the money to afford an expensive tablet. Finding ways to make your patterns look more natural and hand-drawn is an easy way to create your own style in your patterns without a lot of effort. So that is what I want to show you today, how to create hand-drawn elements for your patterns using image trace.
Let’s get started.
Step 1:
The first thing you want to do is create a background for your pattern motif. For the purpose of this tutorial, I am going to use a coffee cup silhouette as my background, but feel free to follow along with any silhouette design.

I did a tutorial on how to create a coffee cup in Adobe Illustrator if you want to learn how to make your own. If you do follow that tutorial you can simplify it so that you are only creating the top circle of the cup, the half circle base, and the handle. I have also included the silhouette of the cup I created so you can follow along. You can find that here:
Step 2:
Print the silhouette out and trace it onto another piece of paper. Since you are not tracing a lot of detail you don’t need a light box or tracing paper. Printer paper is pretty thin and even the blue of my silhouette was able to show up through the paper. Trace the cup with some sort of black pen. My favorite pen to use is a Micron pen. The size of the pen doesn’t really matter because we are going to manipulate the thickness of the lines in Illustrator later. Once you have traced the cup, draw any design you want inside the cup. Here is an example of what the finished cup should look like.
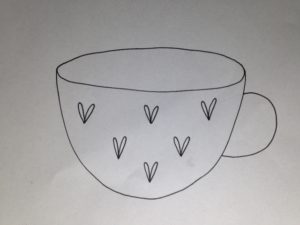
I should also mention don’t bother coloring in anything in. Once we have the cup traced in Illustrator I will show you how to fill things in easily.
Step 3:
Once you have finished drawing your cup and designs inside the cup take a picture of it and import the picture into Illustrator. A lot of designers will tell you that before you import your picture into Illustrator you should go into Photoshop and mess with the saturation and contrast levels to make the background as uniform as possible. It’s really unnecessary for this tutorial so don’t worry about the shadows.
Step 4:
Once you have imported your picture into Illustrator it is now time to trace it using image trace. Image trace can be found in your right-side toolbar. If you cannot find it in your toolbar, click on window and scroll down to image trace. When you click on image trace an options box pops up showing you everything that you can manipulate using image trace. The box looks like this:
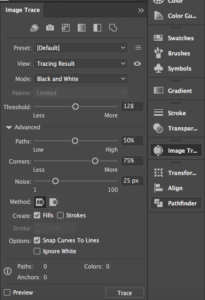
The first thing you want to do is make sure the mode is in black and white. This will ensure a crisper trace. Then with your picture of the coffee cup selected, press trace at the bottom of the image trace panel.
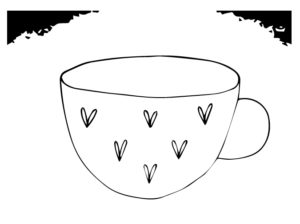
Since we traced a picture that had lots of shadows in it, image trace has actually traced the shadow as an object so we will need to clean that up. Before we do that, there are a few things we need to take care of first. In the image trace panel, click on advanced settings to show more image trace settings. In the options portion of advanced settings, there is an option to ignore whites. Make sure that is selected. Once you have done that, go up to object, expand, and press ok.
Step 5:
With the direct selection tool (keyboard shortcut: A) selected, click on the parts you don’t want and delete them. In the case of the coffee mug, we don’t want the black corners so we need to delete them.
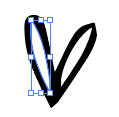
You also want to delete the inside of the hearts which you can do by selecting the inside of the heart with the direct selection tool (A) and deleting it.
Step 6:

Drag the traced image on top of the coffee cup silhouette you made in step 1. You might need to manipulate the cup silhouette to make it fit perfectly with your hand-drawn elements.
Step 7:
Select the traced element minus the hearts and in your top toolbar go to object, path, offset path.
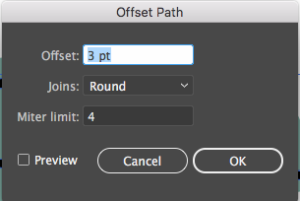
In the offset path options box we are going to change the offset to 3 points. The joins and miter don’t need to be changed so don’t mess with those. Press ok and you have successfully thickened your lines. The original thin line is still there, however, so scroll over your design until you see your original thin line and delete it.
Step 8:
Using the smooth tool, smooth your drawing. The smooth tool can be found underneath the shaper tool
![]()
and looks like this:
![]()
The more you smooth your design the less hand-drawn it will feel so don’t go crazy. It is important to note that the smooth tool smooths specific paths that are selected so if your smooth tool is not working it is likely that you don’t have a path selected.

I ended up changing the hand-drawn cup to white since I liked the look of it better. Here is what the coffee cup looks like repeated in a pattern.

This technique is extremely versatile and can be used in a multitude of ways so if you do try this technique, leave a picture down below and let me know how you used it.
If you liked this post why not share it! It lets me know what posts you like so I can make more posts like this.



Olivia Jackson
Nice write up! All steps are written very well. You have done a great job, keep it up and keep sharing informative article like this.
Kelcie Makes Patterns
Thank you Olivia!